Benefit Hierarchies
The Benefit Hierarchies button is enabled and used with Benefits assignments only. It indicates the benefit hierarchy model chosen, which determines the order benefit balances are reduced when the employee is awarded this assignment.
Effective Dating
The left pane displays the Timeline for this record. The timeline shown is the version that contains the Search Date (entered on the Assignment Code search parameter screen).
Clicking Add Version creates a new timeline version. You will need to enter an Effective Date for the new version. This date can be in the past or in the future. Click Save Version when finished.
Clicking Delete Selected deletes the displayed timeline version. This is only allowed on replicated or added versions, not the original version, because there must always be an Assignment Source in effect.
Clicking Save when editing a timeline version only overwrites the version. It does not create a new version in the timeline.
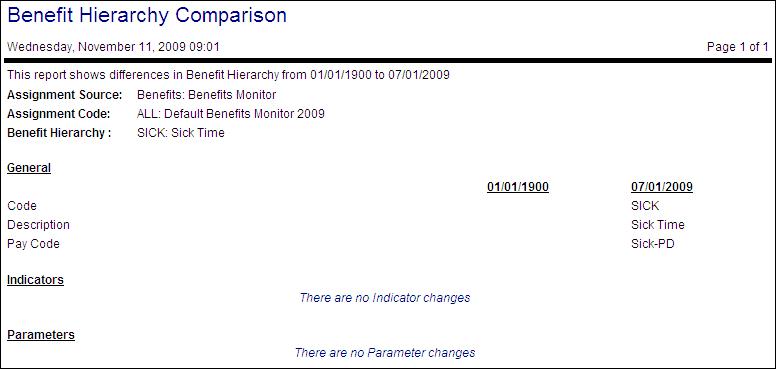
The Comparison Report will display the differences between the selected version and the one immediately prior to it.

Note: Benefit Hierarchy options are only available if they have been previously set up on the Benefit Hierarchy configuration screen. For more information on the fields available when filtering or searching for a record, see the Configuration section>Benefits card>Benefit Hierarchy screen.
The following actions may be available, depending on the user's authorization level. Click on the link below for more information. Click a second time to close the information box.
 Adding a Benefit Hierarchy Record
To add a Benefit Hierarchy record to the list, click on the Add button. The Benefit Hierarchy Search screen is displayed to search for and select records.
- After entering values in the selected fields, click on the Search button. The results are listed below the search screen.
- To select one or more record, click the selection box to the left of the record to alternately add or remove the check mark. To select/de-select all records in a specific search result set, click on the box above the search results to add or remove all check marks.
- Once all records have been selected, click on the Assign Selected button to add the selected records to the Benefit Hierarchy list.
Action Buttons
The following Actions display in the left pane when a search is completed:
 Assign Selected
To assign records to another record, check the boxes to the left of each record and click on the Assign Selected button.
After records have been selected in the search, the following additional Actions are available in the left pane:
 Save
Save
Click on the Save button to save the new or updated information in the current screen.
The system does a validation on fields to verify a valid value has been entered. If the value is not valid, a warning message is generated, and the record is not saved.
 Reselect Data
Click on the Reselect Data button to reload the previous search results, so the user can select which records to display.
 Deleting a Benefit Hierarchy Record
To delete one or more Benefit Plan records from the open record, complete the following steps:
- Check the box on each record to be removed.
- Click on the Delete Selected button in the left pane.
- A message appears verifying the record should be deleted. Click on Yes to continue.
Note: This action removes the selected benefit plans from this record only, it does not delete them from the Benefit Plan configuration screen.
 Filtering the Benefit Hierarchy List
All Benefit Hierarchies currently assigned to this record are displayed on the screen. To limit the number of records displayed, a filter can be applied.
- Click the expand arrow and enter the filter criteria.
- When the criteria have been entered, click on the Filter button to apply the filter.
- To remove the filter and display all records, click on the Remove Filter button.
- To open and view a specific record, click the expand arrow on a record.
Effective and Expiration Dates
The Effective Date is when the displayed record's timeline version became effective.
If there is a more recent timeline version for this same record, the Expiration Date will be automatically filled in with the date one day prior to the more recent timeline version's Effective Date.

 Adding a Benefit Hierarchy Record
 Deleting a Benefit Hierarchy Record
 Filtering the Benefit Hierarchy List