![]()
![]()
![]()
![]()
|
|
|
|
|
The Staffing by Weighted Lookup option allows you to create staffing matrices for the staffing configuration record based on weighted census values. A separate matrix is created for each acuity level to indicate the number of staff needed in a coverage period for each profile and census range.
Note: The profiles available must first be added on the Profiles screen of the Staffing Configuration record.
This type of census category is different than the other types in that it uses two sets of acuity levels to calculate needs.
Staffing Configuration
When you select the Staffing by Weighted Lookup census category, two other fields become available on the Staffing Configurations screen. These fields define the medium acuity level range and, subsequently, the low and high acuity level ranges.
Example: You set the start value as 2.25 and the end value as 3.50. The low range is then 0 to 2.24 and the high range is 3.51 and greater.
Staffing Distribution
On the Staffing Distributions screen, you set the range levels for the Low, Medium, and High acuity levels. This defines the matrix used for Staffing by Weighted Lookup processing.
For each acuity level of Low, Medium, and High, you set the staffing need for all combinations of coverage period, profile, and census value.
How does Staffing by Weighted Lookup Work?
There are six basic steps that the system goes through to determine the Need when using Staffing by Weighted Lookup.
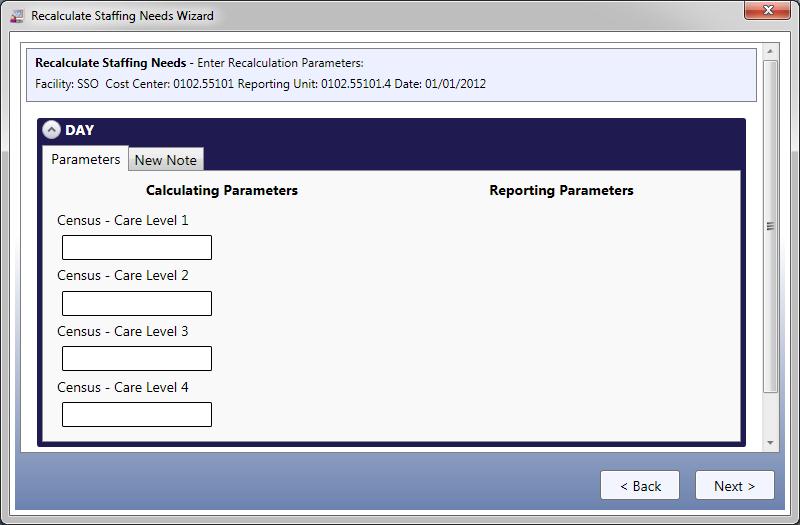
Example: You entered 4, and four Care Levels were established.
Example:
4 patients in Care Level 1
7 patients in Care Level 2
3 patients in Care Level 3
6 patients in Care Level 4
Example:
Care Level 1 (1) * census (4) = 1 * 4 = 4
Care Level 2 (2) * census (7) = 2 * 7 = 14
Care Level 3 (3) * census (3) = 3 * 3 = 9
Care Level 4 (4) * census (6) = 4 * 6 = 24
These values are added together and the total equals the Weighted Census. 4 + 14 + 9 + 24 = 51. The Weighted Census is 51.
Example: Weighted Census (51) / Total Census (20) = 51 / 20 = 2.55. The Calculated Care Level is 2.55.
The Calculated Care Level is rounded to two decimal places.
Previously, you entered values into the Medium Care Range Level Start and Medium Care Range Level End fields, which established the Low, Medium, and High acuity levels.
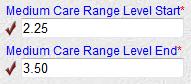
Example: You set the medium start value as 2.25 and the end value as 3.50. The low range is then 0 to 2.24 and the high range is 3.51 and greater. Since the Calculated Care Level is 2.55, it falls into the Medium acuity level.
Previously, you entered staffing needs for all combinations of coverage period, profile, and census range values.
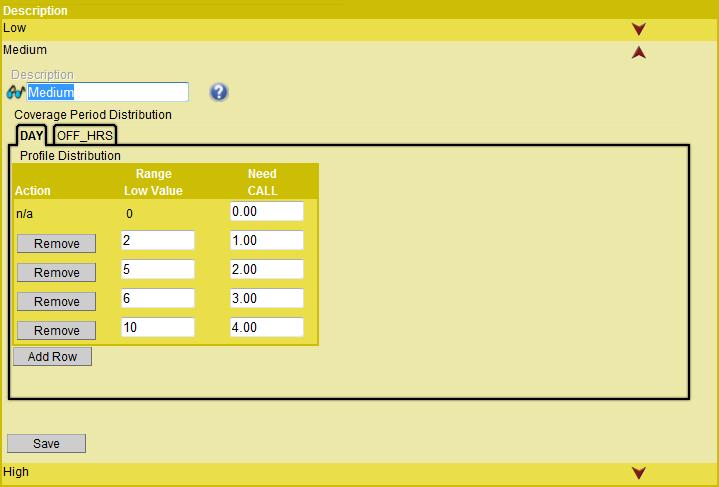
Example: The Medium acuity level is being used, as determined in step 5. The Total Census for the Day coverage period is 20. The employee Need for the CALL profile is 4.00.
Medium acuity level
Day coverage period
Top range level (actual Total Census of 20 is higher than the highest level value of 10)
Profile of CALL
Employee Need is 4.00
Creating a Staffing by Weighted Lookup Matrix
To create a Staffing by Weighted Lookup matrix, complete the following steps:
This value determines how many Care Levels are available on the Recalculate Staffing Needs screen or are needed in the census download.
The Staffing Distributions record appears with the Low, Medium, and High acuity levels.

 Description to identify this acuity level record.
The Coverage Period Distribution tabs indicate the coverage period being configured. The coverage periods displayed are determined by the Coverage Set Code assigned on the General tab.
Needs (number of staff required) for a patient census of zero for each of the profiles listed in the grid.Range Low Value field, enter the lowest value for the current range of the matrix.Note: The upper value of the range is determined by the Range Low Value of the next range. For example, if the third range level has a Range Low Value of 16, the upper range of the second acuity level includes values under 16. Note: All downloaded/entered census values that are higher than the Range Low Value of the final range will be assigned profile staff requirements from that final range.
Note: Values can be copied (replicated) from one coverage period to another and/or one acuity record to another. For more information, see Replicating Staffing Distribution Coverage Period Values and Replicating Staffing Distribution Acuity Values.
Medium Care Range Level Start
This field determines the lowest number (to 2 decimal places) that defines the Medium acuity level. Any number lower is in the Low acuity level.
Medium Care Range Level End
This field determines the highest number (to 2 decimal places) that defines the Medium acuity level. Any number higher is in the High acuity level.